Configure Planon ProCenter
The following figure displays all steps for configuring Planon ProCenter with respect to Connect for Calendars (C4C).

Configure User Groups and Users
The sequence below shows a list of actions to perform such that the User groups and Users are correctly configured for Connect for Calendars.

Create C4C Admin Group & C4C Admin User
1. Create a new User group: C4C Admins and create a new User linked to that user group: C4C Admin.
2. Make sure that the User Group has similar rights as the User Group System Administrators.
3. Generate an Access Key for the C4C Admin Account.
Link product definitions
C4C requires that for User Groups (aka Account Groups) involved in Reservation Management are linked to certain Product Definitions. The table below provides an overview of the Product Definitions and to which type of User Group need to be linked.
Product Definition | User Group | Reason |
|---|---|---|
EnterpriseServiceAPI | C4C Admins | This product definition is required by the C4C app so that it can use the PaaP API. |
EventConnector | All Reservation Management-related User Groups including the C4C Admins | This product definition is required so that the C4C app and C4C can use the Event Connector when an Event/Reservation has to be synchronized. |
JSONServices | C4C Admins | This product definition is required by the C4C app so that it can use the PaaP API. |
Scheduler | C4C Admins | This product definition is required by the C4C app so that it can use the PaaP API. |
PPWeb | All Reservation Management-related User Groups including the C4C Admins | This product definition allows a User to use the Task Specific Interfaces (TSIs) in Web client. |
PSS2 | All Reservation Management-related User Groups including the C4C Admins | This product definition allows a User to use the Reservation Wizard. |
Provide contact's email address for each user
Provide a contact's Email address for each User (including the C4C Admin). This email address will be used by C4C to send notifications to a User about the status of synchronizing an Event and a Reservation.
If errors occur duing synchronization, a notification will be sent to the C4C Admin.
Notifications
Notification templates
C4C includes a set of hard-coded notification templates by default. However, customers can configure their own notification templates in two ways:
• Via the C4C-App Connection
Custom templates can be provided through the C4C-App Connection setup.
• Using Event-Based Notifications
Customers can create reports on the C4C Mail Reports business object and configure Event-Based Notifications for External Reservation Units.
Important to note
There is a functional difference between the delivery timings of the various template types:
• Notifications using the hard-coded templates or templates from the C4C-App Connection are sent immediately after synchronization.
• Event-Based Notifications depend on the frequency of the Scheduled Task responsible for sending them. This task can be configured to run at intervals, with a minimum frequency of every 5 minutes.
Notification templates
This section describes the configuration of notification templates for Connect for Calendars (C4C).
There are three types of notification templates:
• Hard-coded templates
Ask your Planon account manager for these hard coded templates. These can be used as a basis for customer-specific templates. |
• Customer-specific templates based on the hard-coded templates
• Customer-specific templates related to a Report for the C4C Mail Report
In general there are two main templates:
• A template to notify about a single Reservation
• A template to notify about a recurrent Reservation
Single reservation template
The template for a single reservation can have two optional parts:
• Failure-part: part that describes the failure reason when the synchronization between Planon and the third-party reservation management system failed
• PSS URL-part: Part that provides a link to the reservation in the Reservation Wizard. The link is constructed by taking the configured PSS URL on the External reservation unit.
The notification template for a single reservation follows the structure below:
• Header background image
• Title banner
• Reservation details
• (Optional) Failure Reason
• (Optional) PSS URL
• Company Logo
Recurrent reservation template
The template for a recurrent reservation has a required Occurrence-part for each occurrence in the recurrence. And each occurrence can have the same optional parts a single reservation.
The notification template for a recurrent reservation follows the structure below:
• Header background image
• Title banner
• Basic Reservation details
• Occurrence
◦ Occurrence details
◦ (Optional) Failure Reason
◦ (Optional) PSS URL
• Company Logo
Template modification
The hard-coded templates can be influenced by configuration on the C4C-App Connection's Notifications tab.
Header background image
You can provide a different background image for the header. This image will be sized to a height of 175px and full-width (so the image may get stretched). Ideally, the background image should have width of 600px.
Title background color
You can configure colors that will be used as the background color of the title banner of the email. The title's text has the color white by default, hence the advice is not to use bright (pastel-like) colors otherwise the title might become unreadable. Depending on the synchronization type and outcome, you can define colors for the following:
• Base
• Accept
• Tentatively Accept
• Decline
• Changed
• Canceled
• Deleted
• Exception
Company Logo
You can also modify the template's background image and company logo.
How to make a customer-specific template?
This section describes how you can modify notification templates.
Procedure
1. Get the hard-coded templates via your Planon consultant and open your favorite text-editor/mail-template editor OR build a new template from scratch.
2. The template must implement certain place holders for images, colors, labels and data. A place holder must be enclosed with ‘[’ and ‘]’. Example usage of a place holder:
<table cellpadding="0" cellspacing="0" class="es-header" width="100%"
style="mso-table-lspace: 0pt; mso-table-rspace: 0pt; border-collapse: collapse; border-spacing: 0px; width: 100%; table-layout:
fixed !important;">
<tr>
<td align="center" bgcolor="[TemplateColor]"
style="padding: 0px; margin: 0; width: 100%; background: [TemplateColor]; background: linear-gradient(90deg,
[TemplateColor], 40%, [TemplateColorBase] 100%)">
<table class="es-header-body" align="center" cellpadding="0" cellspacing="0" style="mso-table-lspace: 0pt;
mso-table-rspace: 0pt; border-collapse: collapse; border-spacing: 0px; table-layout:fixed !important;
background-color:transparent; background-repeat:repeat;background-position:center top; width: 600px">
<tr>
<td class="es-m-p10b" align="center" style="padding: 10px 0; margin: 0;">
<h1 style="margin: 0; font-family: 'Fira Sans', sans-serif; font-size: 36px; font-weight: 400; color: #FFFFFF">
[TemplateHeader]</h1>
<p style="margin: 0; mso-line-height-rule: exactly; font-family: -apple-system, BlinkMacSystemFont,
'Segoe UI', Roboto, Helvetica, Arial, sans-serif, 'Apple Color Emoji', 'Segoe UI Emoji', 'Segoe UI Symbol';
line-height: 21px; letter-spacing: 0; color: #402218; font-size: 14px; display: none">
<br>
</p>
</td>
</tr>
</table>
</td>
</tr>
</table>
Overview of these place holders:
Place Holder | Type | Usage |
|---|---|---|
TemplateLogo | Style | The logo to be displayed at the bottom of the email |
TemplateBackgroundImage | Style | The image to be displayed in the header of the email |
TemplateColorBase | Style | Base color for the template |
TemplateColor | Style | Indicates the color belonging to the state of the Reservation |
TemplateTitle | Label | Will be used as the <title/> of the HTML of the email |
TemplateHeader | Label | Will be used in the title banner of the email |
MailMeeting | Label | Will be used as the section header for Meeting details |
MailLocation | Label | Will be used as the section header for Location details |
MailWho | Label | Will be used as the section header for Organizer/Booker details |
MailWhen | Label | Will be used as the section header for the moment of the Reservation |
MailOrganizer | Label | Will be used as label in front of the Organizer |
MailBooker | Label | Will be used as label in front of the Booker |
MailOccurrences | Label | Will be used as the section header for the list of Occurrences |
MailReservationNumber | Data | The Order Number of the Reservation in Planon |
MailReservationStatus | Data | The status of the Reservation in Planon |
CalendarItemIdentifier | Data | Will take the data of the field Calendar Item Identifier of the C4C Mail Report |
CalendarItemMasterIdentifier | Data | Will take the data of the field Master Calendar Item Identifier of the C4C Mail Report |
CalendarItemResourceIdentifier | Data | Will take the data of the field Resource Identifier of the C4C Mail Report |
CalendarItemSubject | Data | Will take the data of the field Subject of the C4C Mail Report |
CalendarItemStartDateTime | Data | Will take the data of the field Start date/time of the C4C Mail Report |
CalendarItemEndDateTime | Data | Will take the data of the field End date/time of the C4C Mail Report |
CalendarItemOrganizerAccountIdentifier | Data | Will take the data of the field Organizer Account Identifier of the C4C Mail Report |
CalendarItemBookerAccountIdentifier | Data | Will take the data of the field Booker Account Identifier of the C4C Mail Report |
CalendarItemStatus | Data | Will take the data of the field Calendar Item Status of the C4C Mail Report |
Reservation. | Prefix | Prefix to be used in combination with a field of the referenced Reservation (e.g. Reservation.OrderNumber) |
ReservationUnit. | Prefix | Prefix to be used in combination with a field of the referenced Reservation Unit (e.g. ReservationUnit.Code) |
TemplateFailureMessage | Data | Will take the data of the field failure reason of the C4C Mail Report |
TemplateFailureTitle | Label | Text to be displayed to introduce the failure reason |
OccurrenceFailureMessage | Data | Will take the data of the field failure reason of the C4C Mail Report |
OccurrenceFailureTitle | Label | Text to be displayed to introduce the failure reason |
OccurrenceFailure | Section | This section marker gets replaced by the Failure Message notification-part for the Occurrence |
OccurrencePSS | Section | This section marker gets replaced by the PSS notification-part for the Occurrence |
OccurrenceColor | Style | Indicates the color belonging to the state of the Occurrence |
TemplatePSSLinkURL | Data | Will take the data of the field PSS URL of the C4C Mail Report |
OccurrencePSSLinkURL | Data | Will take the data of the field PSS URL of the C4C Mail Report for the Occurrence |
TemplatePSSTitle | Label | Text to be displayed to introduce the PSS Link |
TemplatePSSLinkTitle | Label | Text to be displayed instead of the link |
OccurrencePSSTitle | Label | Text to be displayed to introduce the PSS Link for the Occurrence |
OccurrencePSSLinkTitle | Label | Text to be displayed instead of the link for the Occurrence |
Occurrences | Section | This section marker gets replaced by the Occurrence-parts for the Recurrent Meeting |
TemplateFailure | Section | This section marker gets replaced by the Failure Message notification-part |
TemplatePSS | Section | This section marker gets replaced by the PSS notification-part |
Customer-specific notification templates based on a C4C Mail Report
A third way to configure notifications is to generate a report for one or more synchronization outcomes and recipient report based on the C4C Mail report and configure Event-based notifications, which have to be referenced by the External Reservation Unit.
Event-based notifications are sent with a configured frequency interval as defined with the scheduled task for event-based notifications. |
Install & configure C4C app for Microsoft EWS API
Prior installing the C4C app you should acquire its license from the Planon License Desk. Once the license for the C4C app for Microsoft Graph API has been acquired you can add that license through the TSI - AppCenter. By adding the license through the AppCenter, the C4C app will be downloaded and installed from the Planon Marketplace.

Procedure
1. Acquire the license for the C4C app for Microsoft EWS API.
2. Navigate to the TSI, AppCenter.
3. Click Add License and provide the license acquired.
This will cause Planon ProCenter to download & install the latest compatible version of the C4C app for Microsoft EWS API for the version of the Planon ProCenter environment. |
4. Click Configure.
The C4C app will be in the state Configuration.
5. Click Link App User Group and select the C4C Admin user's user group.
6. Go to > > and select the step Module Settings.
7. Select the module c4cappews.
8. Provide the following settings:
◦ Access Key: The generated access key for the C4C Admin User.
◦ Notification URL: The URL that Exchange will use to send notifications to the C4C app is:
https://<your Planon environment>/sdk/platform/jaxrs/planonsoftware/com/c4cappews/c4cappewsrest/rest/notification
◦ Subscription check frequency (in minutes): The C4C app for Microsoft EWS API uses the subscription model of an on-premise Exchange environment. The Subscription check frequency will be used by Exchange to send a Status notification when the Room Resource has been idle for the provided time.
The C4C app for Microsoft EWS API will process this Status notification so that it knows that the subscription is still active.
We recommend to use 30 minutes as the subscription check frequency.
◦ (Follows only!) Event Recovery days past: This value is used in the Recovery Task and determines the start date of the period for which Events are retrieved from a Resource's Calendar (now - days past = start date).
◦ (Follows only!) Event Recovery days future: This value is used in the Recovery Task and determines the end date of the period for which Events are retrieved from a Resource's Calendar (now + days future = end date).
Configure C4C linking objects
Once the C4Ca pp for Microsoft EWS API is installed, you can start to configure the C4C linking objects:
• C4C app Connection
• External Accounts
• External Reservation Units.
The following figure shows the steps that need to be performed.

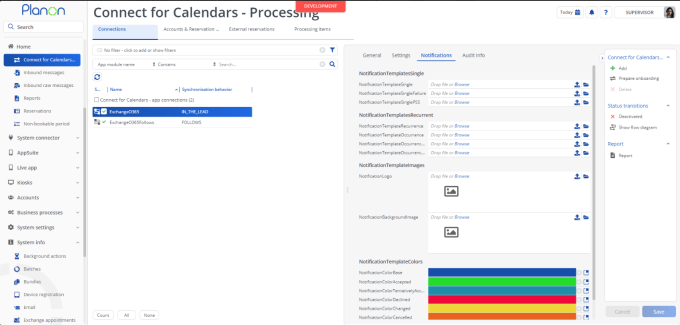
Configure C4C app connection
Procedure
1. Navigate to the TSI C4C app connection.
2. Click Add to create a new C4C app connection.
3. Provide a Name.
4. Provide a Synchronization behavior (In-the-Lead or Follows) for the C4C app connection.
5. Configure the account that is used as C4C Administrator. This account will receive the notifications of the type EXCEPTION, when there is a problem in the synchronization.
6. Select the Classname belonging to the installed C4C app's implementation of the Calendar Item Processor.
7. Provide the settings for the Calendar Item Processor. For C4C app for Microsoft EWS API, these are:
a. Authentication-related:
- Exchange EWS URL: The URL of the Exchange Web Services for the Exchange Server.
- Exchange Version: The version of the Exchange Server. Valid values are 2013, 2016 and 2019.
- Username: The email address of a service account in AD that is allowed to impersonate the Room Resources.
- Password: The password belonging to the service account in AD.
b. Synchronization-related:
- Send Outbound Invitation (Y/N): Indication whether C4C should add the organizer as an attendee to the event that is created in a Room resource for an outbound synchronization. Adding an attendee to the event will cause Exchange to send an invite to that attendee.
- Prevent inbound decline (Y/N): Indication whether the C4C-App should decline the inbound synchronization of an Event in case no Reservation could be created for it.
This setting is useful in the “true”-FOLLOWS scenario and when performing a dry-run of a C4C Onboarding scenario. |
- Delete original subject (Y/N): Deletes the original subject when enabled (if Append Organizer to Subject is not enabled, then subject will be replaced by a translation of “No subject”)
- Append Organizer to Subject (Y/N): Adds either the name (inbound sync) or email address (outbound sync) to the subject.
8. (Optional) Configure a password (can be used instead of the Client Secret)
9. Configure the notification behavior:
◦ Notification Behavior: Configure who should receive the notification: No notifications, Booker, Organizer or Booker and Organizer
◦ Use User's Sender's email address (Y/N): Configure whether Planon should use the sender's email address of the User if applicable (default: Yes).
◦ Separate notifications for occurrences (Y/N): Configure whether Planon should send separate notifications for occurrences or one notification for the recurrent Meeting (default: No).
11. Save the C4C app connection.
12. Change status to ACTIVATED.
(For the C4C-App for Microsoft Graph API, this will trigger a subscription process for each External reservation unit that is active and belongs to the activated C4C-App Connection).
Configure external accounts
Complete the following steps to configure the External accounts for a C4C app connection.
Procedure
1. Navigate to the TSI Enterprise Talk.
2. Import Enterprise Talk definition C4C-ONB-EA.
3. Select the imported Enterprise Talk definition and go to the level Documents and select the document C4C-ONB-IMP-EA1.
4. Go to and select the step Business Objects and select the business object related to External Accounts.
5. Go to and select the field definition C4CAppConnectionRef, which is the reference to a C4C app connection.
6. Configure the default value for this to be the C4C app connection that was created in the previous step.
7. Go back to the level Definitions and run the Enterprise Talk definition C4C-ONB-EA
8. After the run is done, you can go to the TSI C4C Processing and select the step External Accounts to verify the outcome.
Configure external accounts - without Enterprise Talk definition
If you do not want to run the Enterprise Talk definition, you can also add an External Account by completing the following steps.
Procedure
1. Navigate to the TSI C4C Processing.
2. Go to the step External accounts.
3. Click Add to create a new External account.
4. Provide the following details:
◦ Account Identifier: the identifier for the User, which is used by the installed C4C app (e.g. the C4C-App for Microsoft Graph API requires this to be the email address of the User).
◦ Account: The Account in Planon ProCenter to which the User should be linked.
◦ C4C app connection: The C4C app connection for which this External account is active.
◦ Is primary?: Whether the External account should be used as the primary External account in an outbound synchronization.
5. Save the External account.
Configure external reservation units
Complete the following steps to configure an External Reservation Unit.
Procedure
1. Navigate to the TSI C4C Processing.
2. Go to the step External Reservation Units.
3. Click Add to create a new External reservation unit.
4. Provide the following details:
◦ Resource Identifier: The identifier for the Resource, which is used by the installed C4C app (e.g. the C4C-App for Microsoft EWS API requires this to be the email address of the Resource).
◦ Reservation Unit: A Reservation Unit in Planon ProCenter to which the Resource should be linked.
The Reservation Unit must reference a Standard Order or a Standard Order has been configured in Order Settings.
◦ Is production mailbox?: Indicator whether the External Reservation Unit is in use given the environment (e.g. in non-production environments, this indicator should be set to No when you want to be able to synchronize the Resource).
◦ C4C app connection: The C4C app connection for which this External reservation unit is active.
◦ Provide a user status for a reservation's status corresponding with an Event being CANCELED.
◦ (Optional) Provide a user status for a reservation's status corresponding with an Event being ACCEPTED.
◦ (Optional) Provide a user status for a reservation's status corresponding with an Event being TENTATIVELY ACCEPTED.
◦ (Optional) Provide links to Event-based notifications for the notifications sent by C4C upon a synchronization action (e.g. Accept, Decline, Cancel, etc.).
5. Save the External reservation unit.
6. Change status to ACTIVATED
(For the C4C-App for Microsoft Graph API, this will trigger a subscription process for the involved Resource. After a subscription attempt, the field App - Custom field will show the outcome of the subscription).
Configure C4C scheduled tasks
The following diagram shows a series of Scheduled tasks related to C4C that have to be configured.
There are system scheduled tasks that come with the product C4C and there are user scheduled tasks that come with the C4C app for Microsoft EWS API.

Configure system scheduled tasks for C4C
The product C4C has three System scheduled tasks that can be configured in a similar way. Complete the following steps to configure the task.
Procedure
1. Navigate to the TSI Scheduled tasks and step Scheduled tasks.
2. Select one of the following System scheduled tasks:
◦ Remove obsolete External Reservations & External Non-Bookable Periods (including C4C Processing Items).
◦ Archive External Reservations (including C4C Processing Items) that are successfully synchronized and for which the start date/time of the Reservation is 30 days ago.
◦ Remove C4C Mail Reports that are older than 7 days.
3. Select the and configure the frequency of the Task:
◦ Remove obsolete External Reservations: each day
◦ Archive External Reservations: each week
◦ Remove C4C Mail Reports: each week
4. Save the Task.
5. Activate the Task.
Configure user scheduled tasks for C4C
Prior to the configuration, check the configuration of the existing System scheduled task Task User Extension, which has to be configured correctly for the Task user extensions. This task needs to run each 5 minutes.
The C4C app for Microsoft Graph API provides two Task user extensions that can be configured in a similar way. Take the following steps to configure the tasks.
Procedure
1. Navigate to the TSI Scheduled tasks and step Task user extensions.
2. Click Add to create a new task.
3. Provide a Code for the task (e.g. C4C-SUB for the Subscription Task).
4. Select a Classname:
◦ C4C Subscription: This Task user extension will periodically create and patch subscriptions for Resources that are linked to active External reservation units.
◦ C4C Recovery: This Task user extension will periodically recover Events and Reservations. The behavior of this recovery depends on the Synchronization behavior of the C4C app connection.
5. Select the C4C Admin User for the field User.
6. Select the and configure the frequency of the task:
◦ C4C Subscription: This depends on the number of External reservation units configured and when one run of subscription completes for them. If this is less than 110 minutes, then change it to 110 minutes.
◦ C4C Recovery: This depends on the synchronization behavior of the C4C app connection and the number of External reservation units configured.
- For Synchronization Behavior In-the-Lead: 4 hours (as it only needs to synchronize pending Event Messages).
- For Synchronization Behavior Follows: 12 hours (as it needs to synchronize all Events in the Calendar of the Resource for a period bounded by the C4C-App module settings' configuration for recovery number of days past and future).
7. Provide a start date/time (in the future).
8. Save the Task.
9. Activate the Task.