Filtering the Unplanned panel
There are many ways to apply filtering to the Unplanned panel in Resource Planner. These are explained below:
Procedure
1. To apply a quick and simple filter to the Unplanned panel, enter a specific search criterion in the Planon quick filter on the left, for example Property or Requestor.
This type of filter cannot be stored.
2. Secondly, in the filter section on the right, you can apply TSI user filters. These are predefined filters created by your application manager. The behavior of this filter is identical to filtering the elements list.
This type of filter can only be added, edited or removed by application managers.
See Resource Planner Configurations for information on defining a TSI user filter for the Unplanned panel. |
3. Thirdly, in the same filter section on the right, you can define, edit and store your own personal filters. The behavior of this filter is identical to filtering the elements list.
Personal filters are in the same drop-down as TSI user filters. The difference is that you can create, edit and delete personal filters, while TSI user filters are fixed. See the image for the location of the various filter types.
See Fundamentals for information on using and creating filters. |

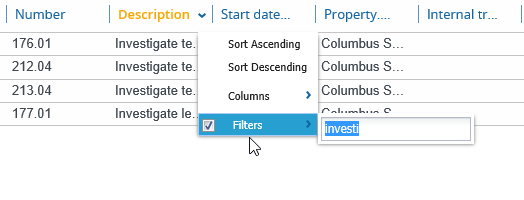
4. Finally, to apply filtering to the content of columns, click the drop-down icon of a relevant column header, for example the Description column.
5. Select Filters.
6. Enter (part of) the search term on which you want to filter the column.
The column is filtered accordingly.
7. Clear the Filters check box to remove the column filter.
