Adding a booking
When you select the Bookings module in the Planon Live app, you will first be taken to the Start page. The Upcoming bookings and Recommended options are shown prominently. The Extra booking options, if available, are at the bottom of the page.
The procedure for booking is virtually identical for all booking options. |
Use the following procedure to book a meeting room, flex desk or any other booking option,like, for example, office equipment.
Procedure
1. On the Start page, select a recommended booking option or an extra booking option, for example: Meeting room or Flex desk.
The Book rooms / Book flex desk page is displayed.
2. If you are booking a meeting room, enter a description for your booking in the Title field.
3. In the Where field, select the location for your meeting / flex desk (building and floor).
4. Select a time slot in the When field.
5. If you are booking a meeting room, select the number of people that will be present in the How many people? section.
6. Select Show results.
The Results page is displayed, with all available options for the selected time and location. If you 'favorite' one or more booking options, these can be easily identified in the list by a star icon. For quick and easy reference, favorite options are always shown at the top of the list.
• For searching reservation units by facilities, see Searching for reservation units by facilities. • If you leave the results page idle for longer than 5 minutes without actually booking, you must start over. |
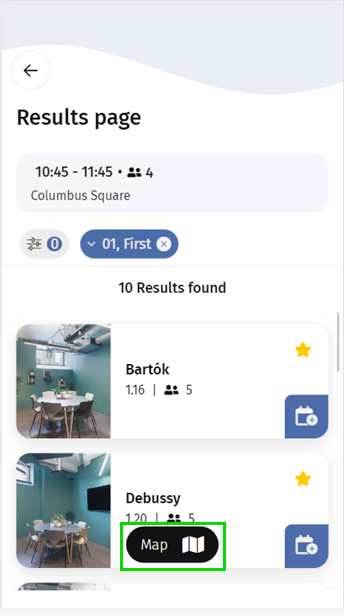
If you set the Floor filter to All floors, you can access a floor selector via the Map icon, in list view. You can subsequently select the relevant floor and go to the selected floor plan. |
7. Now, you can immediately book by selecting the Book now button on the item of your choice:
8. Or … you can view the Details of the room / flex desk, by selecting the relevant block.
Details about the selected room / flex desk are displayed, including information about facilities and any pending requests for this room.
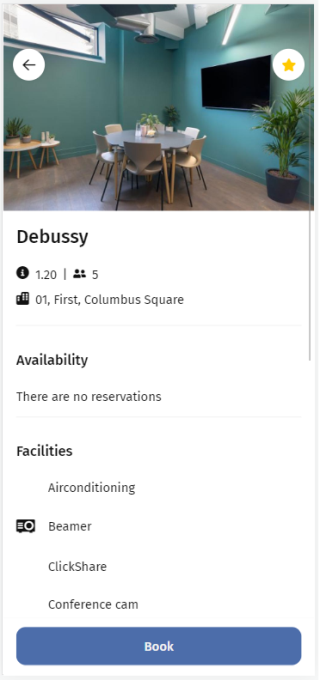
9. To change the booking time, or to make the booking recurrent, click the Edit button. See Creating a recurrent booking for more information.
10. If you decide to mark the room / desk as a favorite, select this icon at the top right of the page:
11. To view location details before booking, select the Location block on the Details page and open the floor plan.
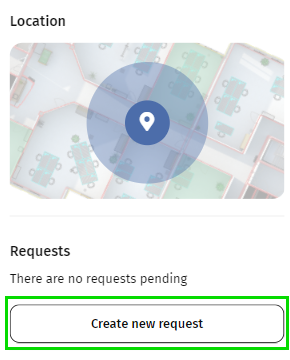
You can click the Create new request button to add a new request for the selected room / flex desk. See Creating a request. |
12. Select Book to finalize your booking.
To make a reservation via QR code, see Making a reservation by scanning a QR code. |
You get confirmation that the booking was successful.

13. Select Done.
You are redirected to the Start page. If you booked for the current date, your new reservation is shown in the Upcoming section on the start page. If you booked for a future date, you can find your new reservation under All reservations.