Adding a temporary fix
Some repairs that you make are only temporary, because the problem cannot be solved permanently yet. Reasons for this may vary: you may not have the right spare parts or equipment; or the asset to be fixed is going to be replaced very soon and does not require a permanent fix. Cases like this can also have an impact on any SLAs that might exist for your customer. In such cases, you can select an action to notify the back-office that the current fix is not permanent. If required, the back-office will reassess the order and reassign it.
A Temporary fix action only applies if: • the work assignment's related order is not a planned maintenance (PPM) order, and ... • the work assignment is a key work assignment, recognizable by this label:  |
There are two actions available for a temporary fix:
• Apply temporary fix and continue - this action on the SLA block allows you to apply a temporary fix without returning the work assignment to the back-office, allowing you to continue to work on a permanent fix. You will not sign off, because you intend to actually complete the work soon.
• Temporary fix - this action ends the work assignment and returns it to the back-office for reassessment (depending on the configuration the back-office status will be updated, for example to On hold). You are directed to the sign-off page.
Procedure 1 - 'Apply a temporary fix and continue'
1. After you have started working on a work assignment, and decide that you want to apply a temporary fix without removing the work assignment from your device, navigate to the SLA block of the work assignment.
Be aware that after selecting Apply temporary fix and continue, you will no longer be able to Discontinue the work. If it turns out that you are unexpectedly unable to complete the permanent fix, you can only end the work by selecting the Temporary fix action. |
a. Select the Apply temporary fix and continue button.
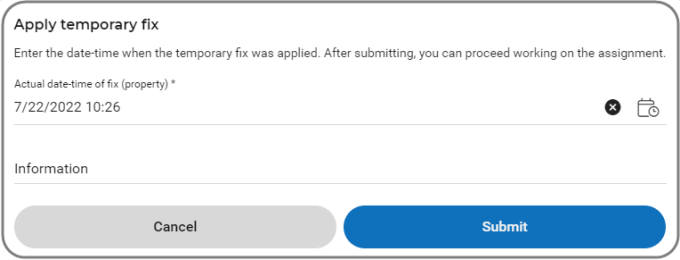
 The Apply temporary fix screen is displayed.
b. In the Actual date-time of fix field, select the date-time for this temporary fix.
c. If required, enter additional remarks of information in the Information field.
d. Select Submit.
The work assignment remains on your device and you can continue working on it, to provide a permanent fix. The back-office will be aware of this temporary fix, because there the work assignment field Applied temporary fix and proceeded? is set to Yes. Also, the SLA field Actual time to fix on the order will be timestamped with the actual date-time of the temporary fix, allowing the SLA to be met while you continue to work on the permanent fix.
Procedure 2 - 'Temporary fix' and end
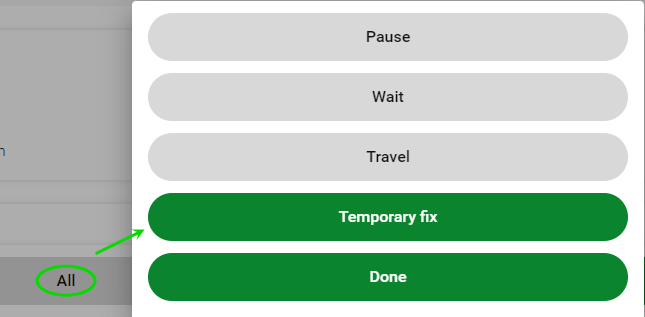
2. If it is immediately clear that you cannot provide a permanent fix, you can apply a temporary fix and end the work assignment, by selecting All at the bottom of the screen and then select Temporary fix.

a. On the Edit […] screen, In the Action date-time field, select the start time for your temporary fix.
b. In the Reason field, select a reason for the temporary fix.
c. If required, enter additional remarks of information in the Comments field.
d. Select Next.
The Engineer's overview is displayed.
e. Check the data and select Next.
If configured on your app, the Sign-off overview for the customer is displayed. Refer to Ending a work assignment and customer sign-off for the next steps. The work assignment is removed from the list and sent to the back-office for reassessment. There, the Actual date-time of fix (TTF) field and the field for the SLA will be updated accordingly.