Configuring Details pages and blocks - generic and specific settings
On the PMFS Live app , a Details page is displayed if the app user selects a block on the app's Summary page. The following table lists these blocks and any special additional configuration options that are worth mentioning:
Blocks | Special configuration options | ||||
|---|---|---|---|---|---|
Order block | |||||
Work assignment block | |||||
Location block | Get directions action. Field engineers can use this action to open a device native ‘Map application’ to get directions to the specified location, based on the longitude/latitude, or on address information.
| ||||
Asset block | Configurable Add, Change and Confirm asset actions, to allow app users to add and edit asset information and give them the possibility to check if they are working on the right asset or not. See also: Adding / changing / confirming an asset. | ||||
Meters block | Additional Add meter reading action, to enable adding Meter readings.
| ||||
Observations block | Option to display observations for an asset. App users can also add new observations via this block. There is a navigation link between this Observations block and the Mobile observations app module, provided you have configured both on the app. | ||||
SLA block (non-PPM orders only | Option to display the Temporary fix and continue action). | ||||
Materials block | Activate the setting Display order lines to enable ordering materials without using the Planon Products catalog. With the order lines setting activated, app users can order materials by adding new order lines or edit existing order lines. Activate the setting Display requisition lines if you want to enable requesting materials from the Planon Products catalog. The requisition lines functionality (adding and editing) becomes available on the app. You must enable at least one of these two settings, but you can enable both. If you enable Display requisition lines, also refer to
PMFS Live app
- Materials module configuration for more information on configuring the complementary Materials app module. Good to know: App users will also be able to add requisition lines without selecting a product from the product list (non-product requisition lines), in case the materials they need are not listed. | ||||
Communication logs block | Option to display communications logs (Comments, Images and Documents) added to the order. Good to know: for PPM-based work assignments, maintenance activity-related communication logs can be configured on the Maintenance activity page. See Configuring the Maintenance activity page. | ||||
Labor hours block | Displayed on the app under Time spent, distinguishing between various types of labor hours such as Travel, Work and Wait). You can also configure options for the Edit labor hours and Add labor hours pages and blocks. See below.
The app displays running labor hours, so the Time spent block on the app is updated with each status transition.
| ||||
Related orders block | Option to display blocks with related orders that were Last reported, Last completed and Next planned for the asset from the order that the engineer is currently working on. | ||||
Checklist items block (PPM orders only) | Option to display the checklist items for a PPM based work assignment. |
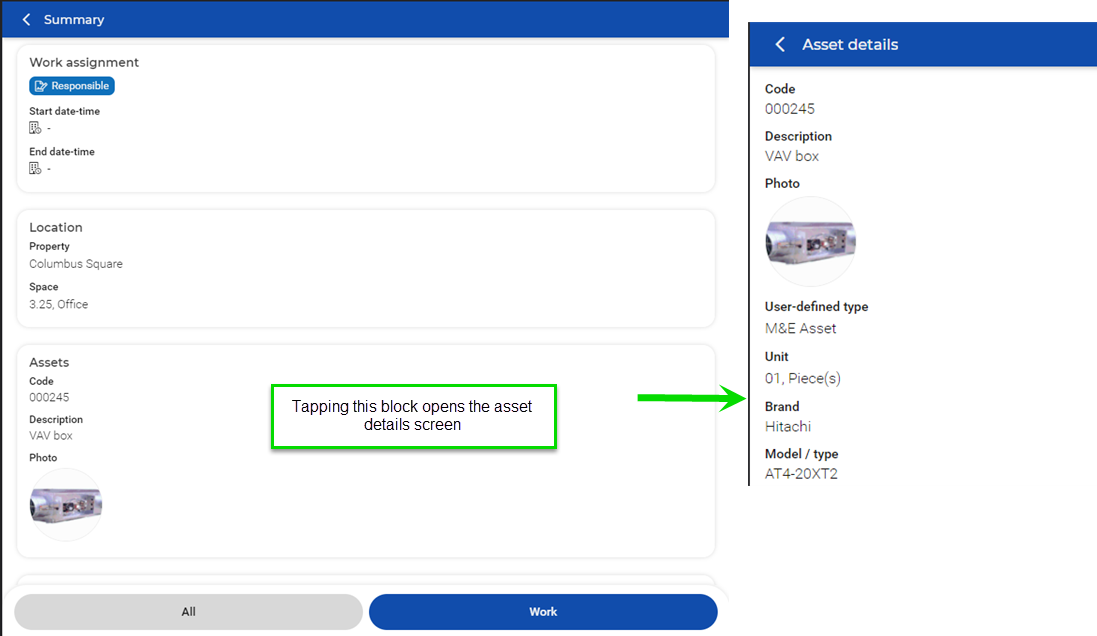
The following image shows a Details page, in this case for an asset related to an order. The procedure explains how you can configure the Details pages and blocks for most order types.
If the sub web definition is linked to a planned maintenance order, start with configuring the Maintenance activities page and its blocks / the Maintenance activity page and then proceed with their respective Details pages and blocks. See: Configuring the Maintenance activities page, Configuring the Maintenance activity page and Configuring details pages and blocks (PPM orders). |
Procedure
1. In > > , select the relevant sub web definition.
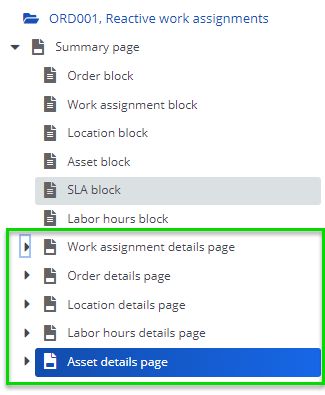
2. At the bottom panel, select and expand the relevant details page (see the list above for the various types).
3. In the data section on the Page properties tab, edit the settings as required.
4. Click Save.
5. Go to the > .
6. Select the Details fields tab and edit settings and fields as required.
7. Select the Actions tab and make settings for the Reassign action.
This action is configured as being visible by default, but you can hide it here, if you do not want to allow direct reassigning of work on the app. If required, you can also change the Label or select a different Edit definition.
8. Select the > .
9. Select the List fields tab and edit settings and fields as required.
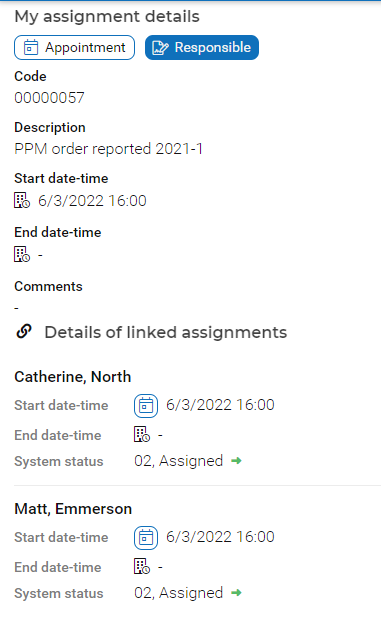
This list shows end users details about all work assignments that belong to the related order. It also shows which work assignments are key (Responsible button), high priority or an appointment booking (Appointment button) .
10. On the other sub details pages (see image), select and view the corresponding details blocks.
11. On the Details fields tab, edit the settings and fields as required.
The Labor hours details page also includes an Edit labor hours details page and block and an Add labor hours details page and block, where you can configure labor hour related fields that you want to be available for editing or adding on the app. Internal tradesperson, Start date-time, End date-time and Hour type are default fields that cannot be removed. These editing options are available on the app for work assignments in the Travel, Work and Wait statuses. For information on configuring the registration of labor hours for external workers see Configuring external labor hour registration. |
12. Click Save.