Card reader
Kiosk support card readers with keyboard emulation. The following devices are recommended:
• RF IDeas pcProx Enroll HID iCLASS ID# Pearl USB Reader
• RFID Multi-ISO Reader with Keyboard Emulation
Card readers with keyboard emulation provide an easy way to transfer data from card to computer. Typically, these readers use USB connectivity and work on 32-bit and 64-bit operating systems.
1. Device installation
Insert the card reader in any of the available USB ports on the Kiosk computer. The operating system will detect the device and install the drivers automatically.
2. Configuration
Card reader manufacturers provide configuration software to configure the device to read specific types of cards (i.e. MiFare, HID iCLASS, DESFire):
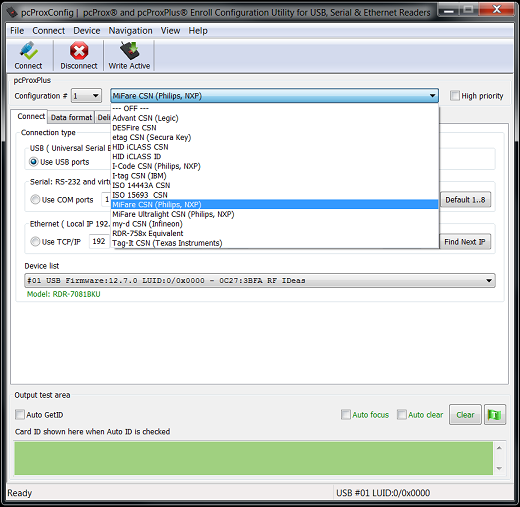
Configuration tool for the RF IDeas pcProx card reader – Selecting the card type
Selecting the termination keystroke (required)
When the device reads a card, it sends data to the computer through the keyboard buffer, so if the data to be sent is “ABC123”, the reader will literally "type" the characters "A" "B" "C" "1" "2" "3" and terminate the sequence with one final keystroke, which is often "ENTER". This is called the "termination stroke" and should be configurable. For Kiosk, “ENTER” must be the termination stroke.
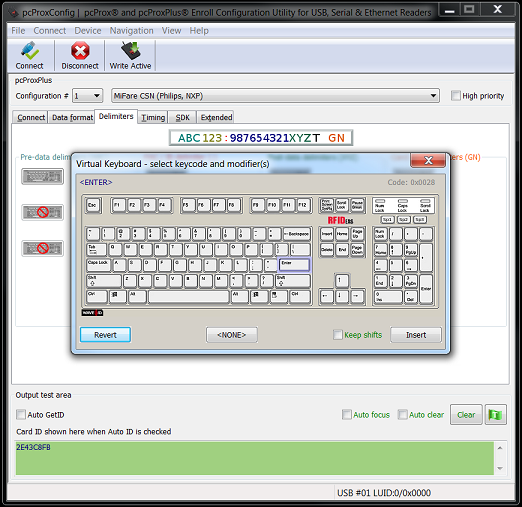
Configuration tool for the RF IDeas pcProx card reader – Selecting the termination keystroke
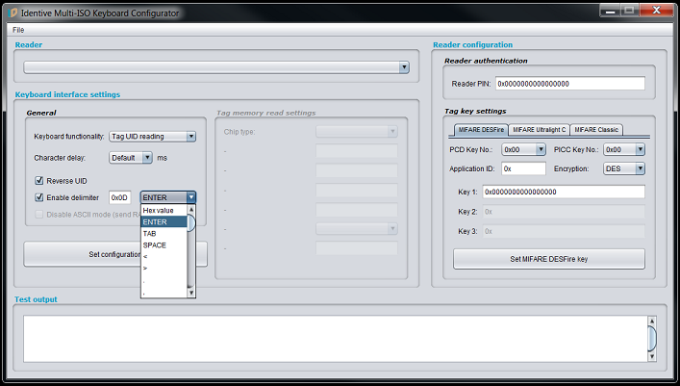
Configuration tool for the Identive Multi-iso Reader card reader - Termination keystroke
3. Testing the card reader device
To test if the device is working properly:
• Open a text editor (e.g. Windows Notepad).
• Hold the card against the reader.
• Verify by typing a text in the text editor.
4. Configuring and testing the card reader for use in the Kiosk
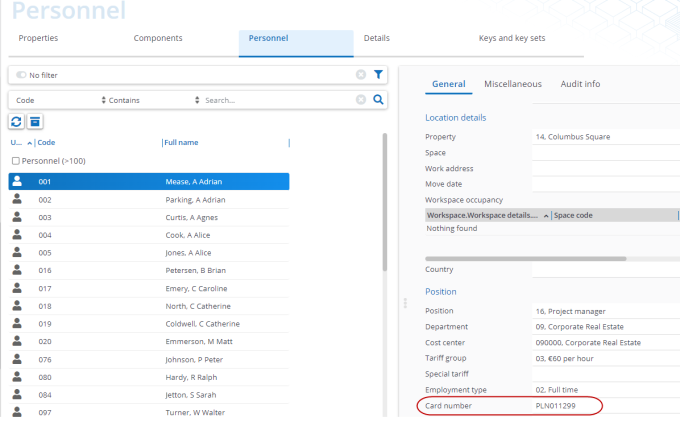
• 4.1 Linking the card ID to a person in Planon
The card's code, for example “PLN011299” must be identical to the value of the field Card number (system name CardNumber) in Personnel .
• 4.2 Testing the card reader in the Kiosk
◦ Make sure the setting Identification mode in Kiosk settings is set to Smart card.
◦ Open the Kiosk app.
◦ Hold the card against the reader.
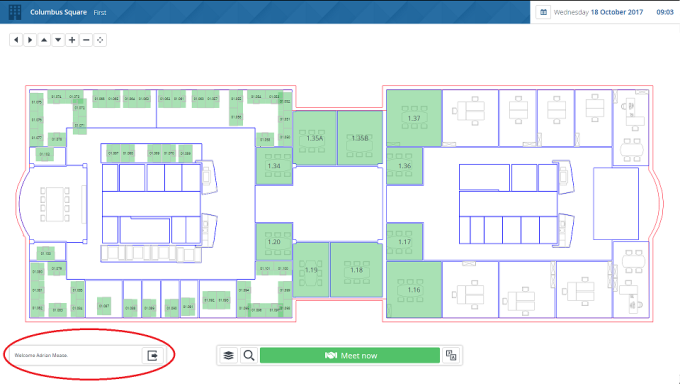
◦ The person's name is displayed, as in the following image:
