Configuring Azure AD
The C4C-App for Microsoft Graph API requires that you register a new App through Azure AD. This new App should use OAuth2.0’s Client Credentials grant-flow and should provide application level read-write permissions to the APIs: Calendar and Mail.
The following flow diagram displays the steps involved in configuring Azure AD.

Registration Azure AD
Take the following steps to register Azure AD.
Procedure
2. Select the menu option: App Registrations.
3. Click the button New registration.
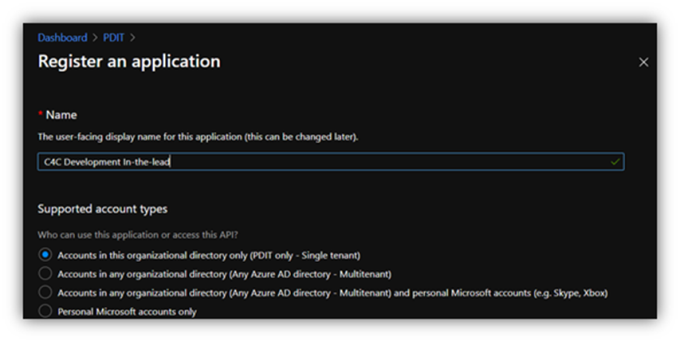
4. Provide a name for the application and save (e.g. Planon C4C).
5. Once created, note down the Tenant ID and Client ID. You will need them later when configuring the C4C app in Planon ProCenter .
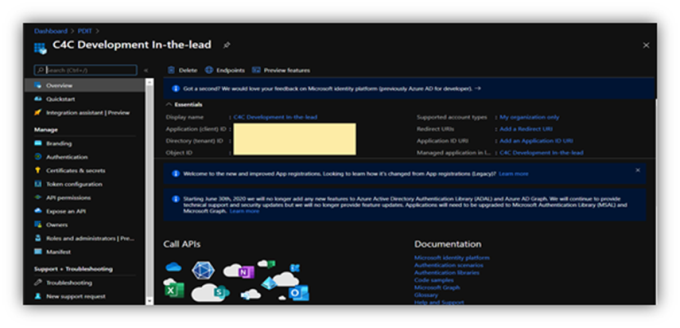
Azure permissions
Procedure
1. Select the button View API Permissions or select the menu option API permissions.
2. Click the button Add a permission.
A Request API permissions window appers.
3. Select Graph API.
4. Select Application permissions.
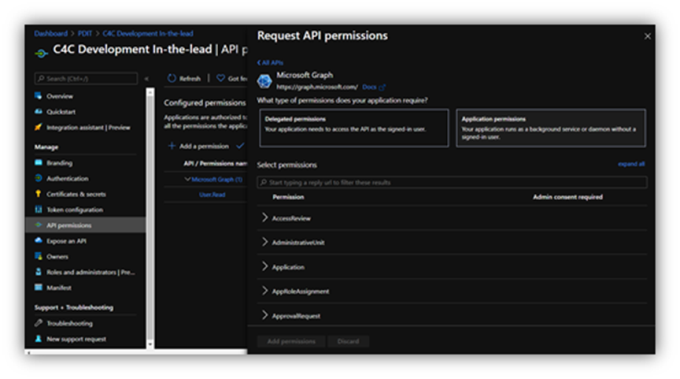
5. Expand the permissions for Calendars and select the check box Read & write calendars in all mailboxes.

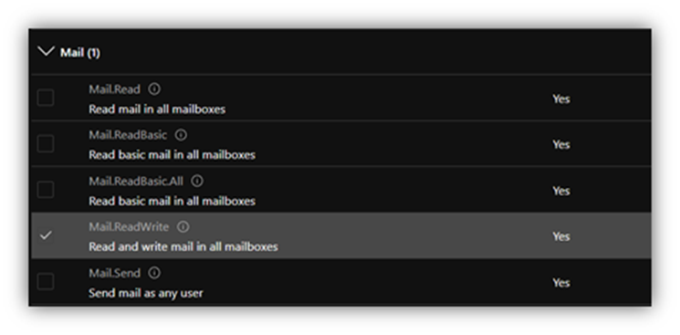
6. Expand the permissions for Mail and select the check box Read & write mail in all mailboxes.
Permissions only to be set for sync-behavior In-the-lead. |
7. Click the button V Grant admin consent for ….
Adding client credentials
Procedure
1. Select the menu option Certificates & secrets.
2. Click New Client Secret.
The Add a client secret dialog box appears.
3. Add a Description and an Expiration period for the client secret.
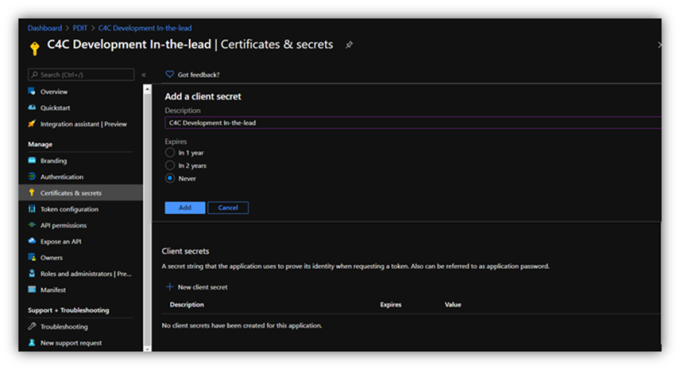
4. Click Add.
Copy the generated Client secret to a safe location. You will not be able to retrieve it once you leave the page or perform another operation. |
The Client secret is added.