Configuring Entra

The C4C-App for Microsoft Graph API requires that you register a new App through Entra (formerly known as Azure). This new App should use OAuth2.0’s Client Credentials grant-flow and should provide Application level read-write permissions to the APIs: Calendar and Mail.
Take the following steps to achieve this.
Procedure
2. Select the menu option: Applications > App Registrations.
3. Click the button: + New registration
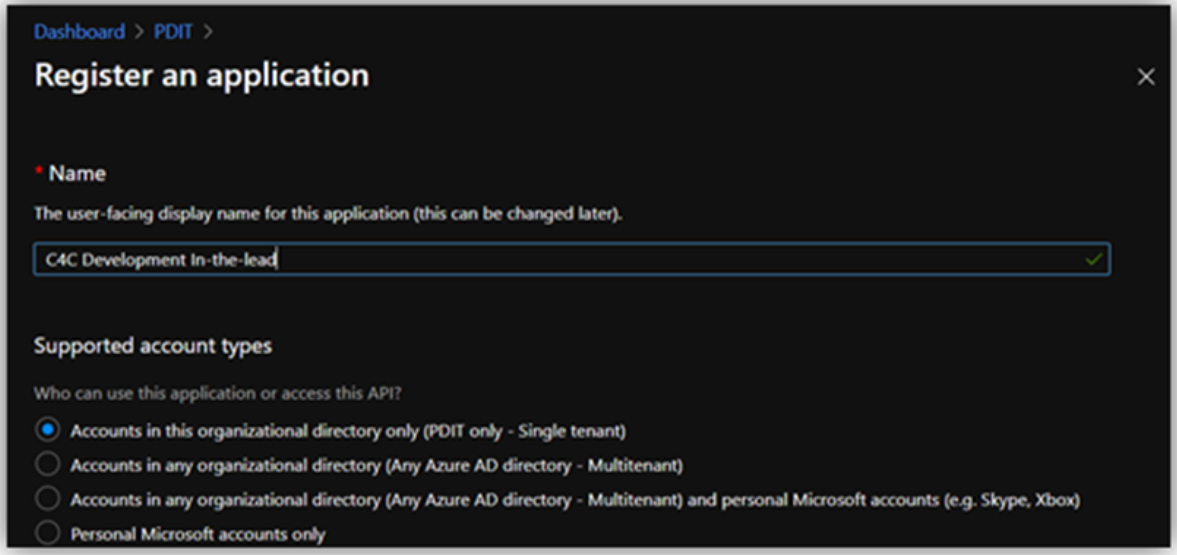
4. Provide a name for the application and save (e.g. Planon C4C).
5. Once created, note down the Tenant ID and Client ID. You will need them later when configuring the C4C-App in Planon.
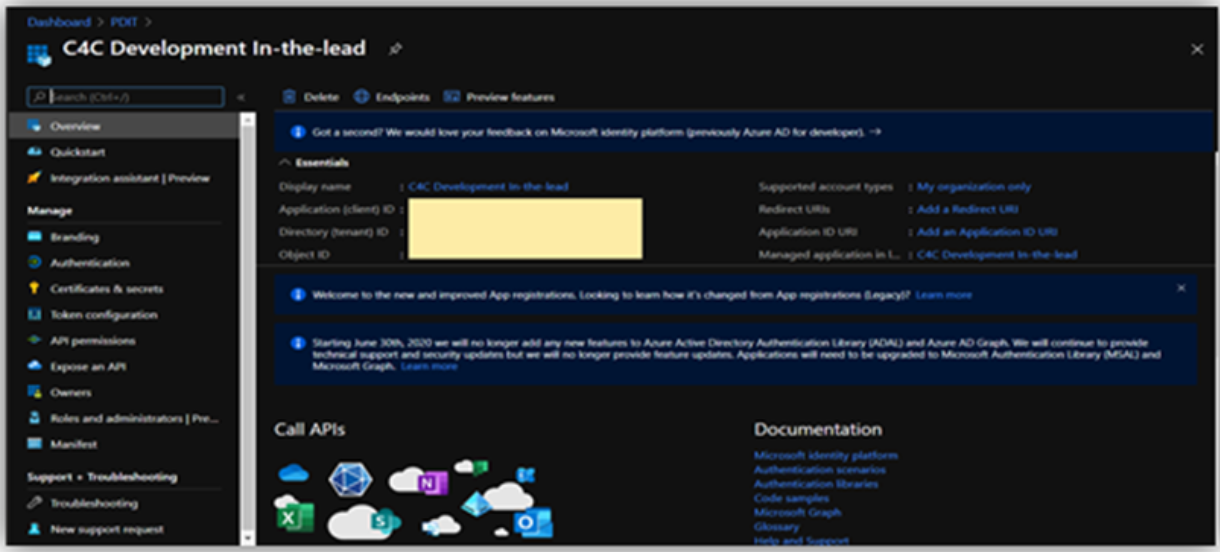
6. Permissions - Click the button View API Permissions or select the menu option API permissions.
7. Click the button: + Add a permission.
8. From the panel that opens select Graph API.
9. Select Application permissions.
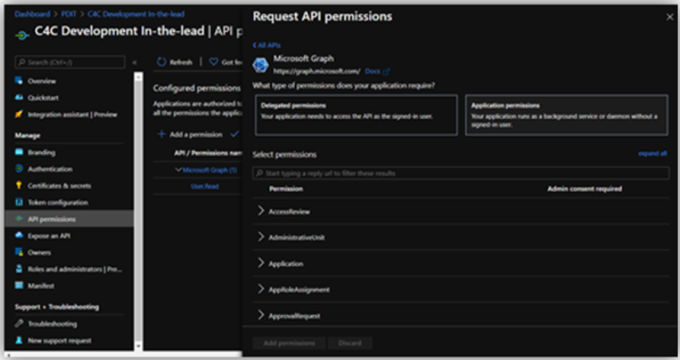
10. Expand the permissions for Calendars and select the box in front of Read & write calendars in all mailboxes

11. (Permission only to be set for sync-behavior In-the-lead) Expand the permissions for Mail and select the box in front of Read & write mail in all mailboxes.
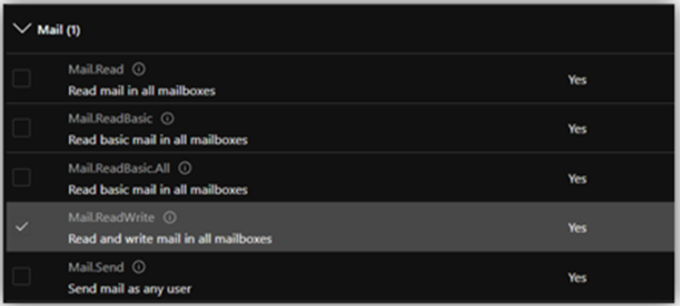
There is no need to consent the permissions as we will configure RBAC for this App. |
12. Client Credentials - Select the menu option Certificates & secrets.
13. Click the button: + New Client Secret.
14. In the dialog that opens provide a Description and an Expiration period.
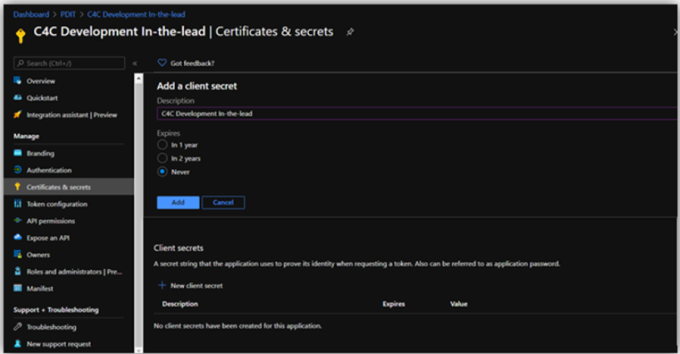
15. Click the button: Add.
16. Copy the generated Client Secret to a safe location.
You will not be able to retrieve it once you leave the page or perform another operation! |