Configuring Planon User federation
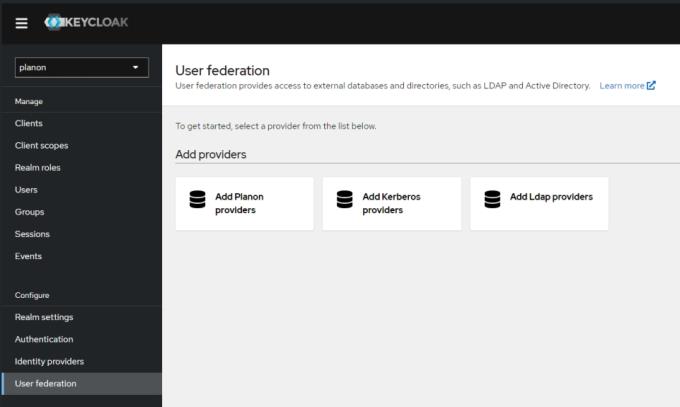
Proceed as follows to configure User Federation: Planon.
Procedure
1. Add a Planon provider in the section User Federation of KeyCloak.

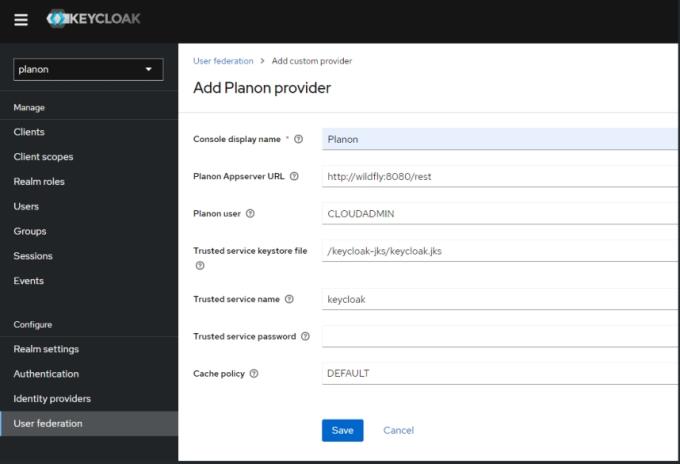
2. Fill out the settings.
In a Planon Cloud environment only the Console display name needs to be entered, all other fields are pre-configured.
Most of them are initialized correctly for Cloud environments so they need not be changed.

The following table provides a description of the required settings:
Field | Description |
|---|---|
Console display name | The name of the user federation in the Keycloak configuration. |
Planon AppServer URL | The location of the Planon backend that can handle user validation. For Cloud, the default value is fine. |
Planon user | The user that is used to perform queries to the Planon backend. This should be an active user. |
Trusted service keystore file | The user federation uses a trust between Keycloak and the Planon backend. This file contains the keys. For Cloud, you can leave this as is. |
Trusted service name | The user federation uses a trust between Keycloak and the Planon backend. This is the name of that trusted service. For Cloud, you can leave this as is. |
Trusted service password | The user federation uses a trust between KeyCloak and the Planon backend. This field can override the password. For Cloud, you can leave this as is. |
Cache policy | Sets the caching policy. Default should be fine. |
3. Click Save to apply your settings.
A check with the configured backend is carried out to verify that all configured values are correct. When a mismatch is detected, the save will fail and an error with specific error information will be displayed.
If saving is succesfull, the user federation is activated.
End users can now log in via Keycloak with the user name and password that are stored in the Planon backend.

Managing users can still be done through the Planon Accounts TSI. For more information, see the Planon Webhelp. |