Event Field descriptions
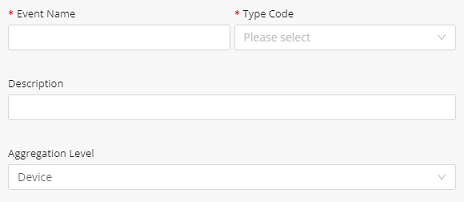
The first four fields are shared by all events.
Field | Description | ||
|---|---|---|---|
Event Name | This is the name of the event that will be created from this custom event. This value can be whatever you want. | ||
Type Code | This is the type code of the event that will be created from this custom event. This can be whichever type code you want, however the list is filtered by type. For all events except the Condition Formula, the typecode must be numeric because it outputs numeric values. The Condition Formula can be either numeric or string.
| ||
Description | Enter a meaningful description. | ||
Aggregation Level | Note that there will be additional filtering of the data streams based on product/event. | ||
Device level While this option is called device level, it is more accurately device/thing level. This will only take data from data streams that are directly on the device/thing itself. So, this type is good for transposing data on the device directly (Dividing a data stream by 1000), or in a thing it is useful to layer custom events on other custom event (for example create a hierarchy custom event for Occupied Desks, another hierarchy event for Unoccupied desks, and then create a thing level event to sum those data streams. Note that order of the events is relevant as they are calculated in order) | |||
Groups | |||
Groups - Same Level Only This can only be created on group templates, this will aggregate the data streams of all the Devices directly in the group, so for example if I have multiple energy meter devices in a room, I can use this to combine them into the total room energy consumption. | |||
Groups - One Level Down This can only be created on group templates. This will add all the data streams from exactly one level down the hierarchy, but not include devices in the group itself. This is useful in hierarchy situations where you want to aggregate things from one level down. For example if you want to create a floor energy consumption which consolidates the data from the room level energy consumption readings. | |||
Groups – All Levels Down This can only be created on group templates. This will add all the data streams from all the devices/things that are underneath this group in the hierarchy regardless of depth. | |||
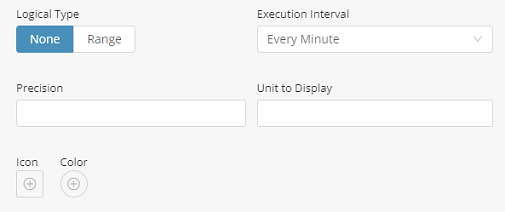
Logical type | Setting a range will affect coloring for the readings in widgets/diagrams, etc. (This is the same as for a regular event). | ||
Precision | How many digits should be displayed after the decimal point to show for this event. (This is the same as for a regular event). | ||
Unit to display | The unit of the reading. (This is the same as for a regular event). | ||
Icon | Sets the Icon for the reading. (This is the same as for a regular event). | ||
Color | Sets the color for the reading. (This is the same as for a regular event). |
Aggregation Event
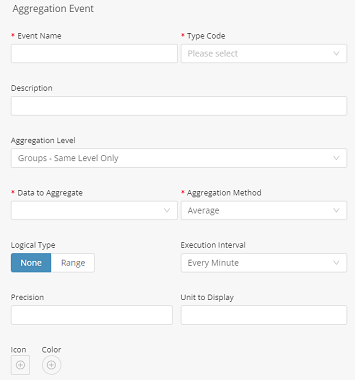
Aggregation Event:
• Is used to aggregate the current status of multiple data streams, for example, I want the max temperature from all the fridges in my store.
• Must be a numeric data stream.
Field | Description |
|---|---|
Data to aggregate | This tells the calculation engine what event we are working on (this is then crossed with the aggregation level to choose the data stream we will be aggregating. To help you find the event it is broken down by product. The options are: • Cross Product Events: This allows you to choose an event that is cross product, based on the type code and the event name. So for example you can have multiple electric meters from different manufacturers and use this to aggregate them together. • Single Product Events: This lets you find any product/group template and choose any event from them. • Current Product Events: This lets you choose any event that is on the product/group template you are working on now. You can also find this product in the Single Product Events, this is just a shortcut to product/group template you are working on now. Note that if you choose an Aggregation Level of Device you can only choose Current Product Events. This is because the aggregation level will filter out anything that isn’t the current device. |
Aggregation Method | This sets what aggregation method to do on all the data streams that were found on device/things based on the aggregation level and the event filtering, the options are: • Sum • Average • Min • Max |
Historical Event
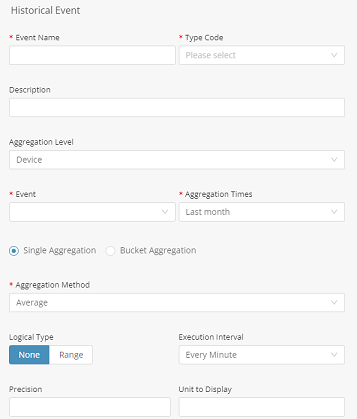
• Is used to aggregate historical data of multiple data streams, so for example you could use this to create a new data stream which is the total energy consumption for the last 24 hours.
• Must be a numeric data stream.
Field | Description |
|---|---|
Event | This tells the calculation engine what event we are working on (this is then crossed with the aggregation level to choose the data stream we will be aggregating. To help you find the event it is broken down by product. The options are: • Cross Product Events: This allows you to choose an event that is cross product, based on the type code and the event name. So for example you can have multiple electric meters from different manufacturers and use this to aggregate them together. • Single Product Events: This lets you find any product/group template and choose any event from them • Current Product Events: This lets you choose any event that is on the product/group template you are working on now. You can also find this product in the Single Product Events, this is just a shortcut to product/group template you are working on now. Note that if you choose an Aggregation Level of Device you can only choose Current Product Events. This is because the aggregation level will filter out anything that isn’t the current device. |
Aggregation Times | This is what historical period we want to include in our aggregation: • Last hour – 60 minutes going back from the time the calculation is executed, so this window will change at every execution • Last full hour – this will include everything from the last hour that is already done, so for execution times of 2:20pm, it will include the period of 1-2, and will do so until the time is 3:00pm, at which point it will include the period of 2-3 • Yesterday – this will include all the datapoints from the previous day, and will change at midnight • Last 24 hours, this will include all the data points from the last 24 hours and will change every execution • Last week – this will include the last full week that finished • Last 7 days – this will include 7 days starting at the current time and will change every execution • Last month – this will include the last full month that finished and will change at the 1st of every month • Last 30 days – this will include 7 days starting at the current time and will change every execution |
Single aggregation/Bucket aggregation | The calculation engine will allow you to support either a single aggregation for the entire historical data or a two-step process where you aggregate the data twice. If you chose single aggregation you choose between the various aggregation methods available, if you chose bucket aggregation you will be able to do two separate roll ups:  The calculation engine will first roll up the data into the bucket interval selected, with the bucket aggregation method, and then roll up the rolled-up data points into one data point, with the outer aggregation method selected. This allows you to create scenarios like, create the sum of the energy consumption per day, and then create an average of the daily energy consumptions per month. |
Count by Value Event
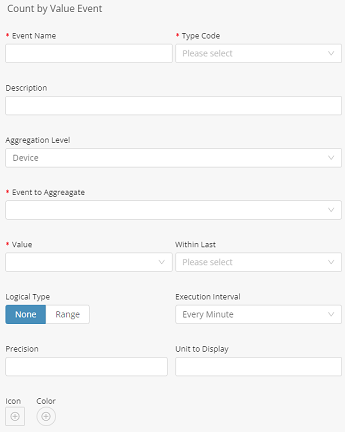
Count by Value Event:
• Is used to count how many different streams currently have the value of X from a list of allowed values. For example, how many of my desks are currently occupied.
• Must be an Allowed Values data stream (Open/Close, Occupied/Free/NA, etc)
Field | Description |
|---|---|
Event to aggregate | This tells the calculation engine what event we are working on (this is then crossed with the aggregation level to choose the data stream we will be aggregating. To help you find the event it is broken down by product. For count by value, you cannot choose a cross product event |
Single Product Events | This lets you find any product/group template and choose any event from them: • Value – The value you want to count, dynamically on the event chosen, so if the event for Door can be either Open or Closed, you will see both these options. • Within Last – since this is supposed to aggregate the current value, you must decide how far back is considered “current”, this could be different based on the business logic you are trying to implement: The options are: • Cross Product Events: This allows you to choose an event that is cross product, based on the type code and the event name. So for example you can have multiple electric meters from different manufacturers and use this to aggregate them together. • Single Product Events: This lets you find any product/group template and choose any event from them • Current Product Events: This lets you choose any event that is on the product/group template you are working on now. You can also find this product in the Single Product Events, this is just a shortcut to product/group template you are working on now. • Note that if you choose an Aggregation Level of Device you can only choose Current Product Events. This is because the aggregation level will filter out anything that isn’t the current device. Anything that is not in the time frame will be ignored, so if you chose the door event, on value open and within last 24 hours, if the current reading of a specific door is open, but that reading was sent 3 days ago, it will not be counted. |
Percentage Event
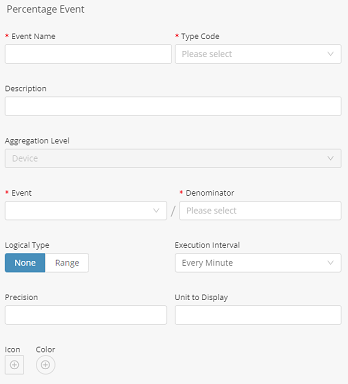
Percentage Event
• Will calculate the percentage between events or between an event and a property that is defined on the device/group. For example, you can set an occupancy limit per room as a property, and then use an event for current occupancy and then create a percentage event to track utilization.
Field | Description |
|---|---|
Numerator | The numerator hast to be a numeric event. |
Denominator | Can be either a numeric event or property. |
Event with Function Formula
Event with Function Formula:
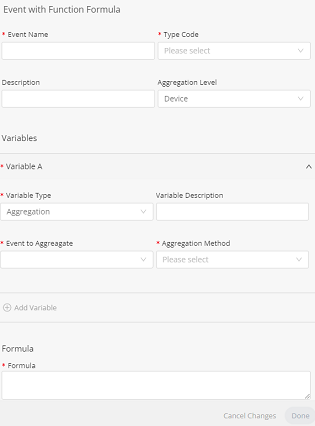
• Will let you define variables and then create an open formula with these variables. For example, you can define A to be the current number of people in a room, B the energy consumption and C the price of electricity and then create the formula (A/B)*C to create a KPI for energy cost per person.
• All variables must be numeric values.
Field | Description |
|---|---|
Variables | Variables have five types: 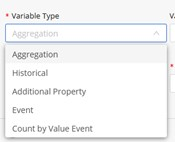 • Aggregation – has the same options as aggregation event (see documentation above) • Historical – has the same options as historical event (see documentation above) • Additional property – choose which additional property you want to include as a variable, it can only be numeric properties that are defined on the product/group template you are working on, as it does not aggregate the additional property but takes it as is. • Event – this takes the value from the last event that matches the event filter across the hierarchy level selected. So, if you have 4 devices that have this reading it will take the latest one. • Count by Value Event- has the same options as count by value event (see documentation event) You can create as many variables as you want and then use them in a formula. |
Formula | This is an open text field where you can input an expression using the variables you created, in addition you can use +,-,*,/,() and numbers. Remember that every variable will create just one number so the expression will be a simple expression after the variables are resolved. Example formulas can be: • A+B • A * 2 • (A+B)*(C+D) • A/B Note that when introducing a division into your formula you must make sure that you do not divide by zero, as that will cause the event to not be calculated. |
Condition Formula Event
Condition Formula Event:
• Lets you create the same variables but then use them in series of Boolean expressions to transform them to a list of discrete options. So, for example, with the same A B C you could say If A/C > 10 -> Green , if B = 200 -> Yellow otherwise Red.
Variable configuration is the same as Function Formula, see documentation above.
As for the conditions themselves:
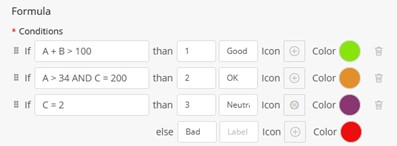
Each condition must resolve to true or false, so <, >, =, <>, >=, <=, AND, OR
Conditions are evaluated top down with the first one that matches causing the evaluation to return, if none of the expressions return true, then the default value is return, for that reason a default value must be set.
You can either set a value or a value/label combination. Unless you have a specific use case just set the value, in addition you can set icon/color per value.