BIM viewer
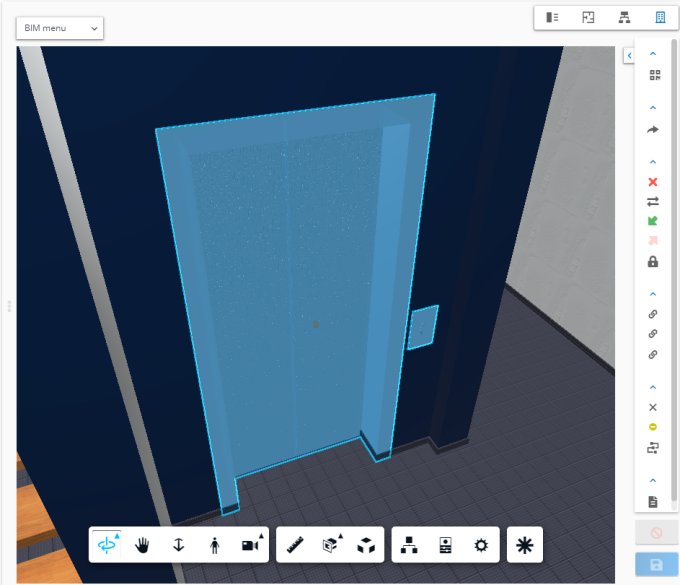
BIM viewer is a visual component that enables users to view 3D BIM models inside the Planon data panel.
BIM viewer is available in:
• Assets
• Spaces
When viewing your BIM models in BIM viewer, you can perform all kinds of actions, highlight elements and perform analyses.

BIM models are 3-dimensional and consist of views that you can share.
Revit to SVF
The BIM model format is a revit file, which needs to be converted into SVF/SVF2 in order for BIM viewer to be able to display it.
For more information, see Conversion.
Check out the video on Configuring BIM viewer on our Planon Software channel. |
BIM controls
There are a number of controls available to manipulate your BIM model in BIM viewer. The following table explains what the various icons do.
Tool | Function | How to use | Tips |
|---|---|---|---|
 | Orbit | Click the left mouse button, drag to rotate. The Free Orbit option, enables you to freely rotate and tilt the model in any direction. | |
 | Pan | Drag to move the model to a different part of the viewer. | |
 | Zoom | Move the cursor over the model, scroll the mouse wheel forward for zoom out and backward to zoom in. | You can use the Zoom option after selecting other options like First person, or Measure. You can also use the Zoom option before you use Measure. |
 | First person | Use the First person tool if you want to navigate through a model as if you were actually inside the model. | |
 | Camera Interactions | Select and drag. | |
 | Section Analysis | Select the type of section analysis you want to use. You can select: • Add Box to section a specific area. • Add X Plane to section along the X axis. • Add Y Plane to section along the Y axis. • Add Z Plane to section along the Z axis. Drag the desired manipulators until the model is sectioned the way you want it. When done, click the Section Analysis button again to turn off sectioning. | |
 | Measure | Click at the point from which you want to measure. Click the point to which you want to measure. The measurement is displayed in the model itself. You can edit the Angle, and Calibrate and Delete the measurement. In Measure settings, you can change the Unit type, Precision and also Isolate the measurement. | Zoom in if needed before you measure. |
 | Explode Model | Drag the slider forward to separate and see the individual parts that make the 3D building model. Drag the slider back to bring the model together. | After using the explode option, you can rotate and zoom to get a closer look at the parts. |
 | Model browser | Select the model browser. Enter the name of the part that you want to look at in the search bar. | After you use the model browser to find a part, you can select sections of that part. Click the Properties option to view the properties of your selection. |
 | Properties | Click to view the properties of a selected part within the building. | Use the Model Browser to select a part and click Properties. |
 | Settings | Click this button to open the viewer settings. | |
 | Isolate | Select a part of the building and isolate it by clicking this button. The rest of the design will be grayed out. | |
 | Viewpoints | Click to open the Viewpoints dialog which you can use to view or create viewpoints. | |
 | Model type selector | Click to open a dialog in which you can see or select a specific model type. |