Planon Connect for Analytics
Connect for Analytics supports the authorization code flow with a public client and Proof key for code exchange (PKCE). This way users will authenticate against the configured Identity provider or user provider.
To use Connect for Analytics with OIDC you must configure your cloud environment via the Environment management gadget on the SSO tab and enable OpenID Connect for the Planon Connect for Analytics solution. Additional Keycloak configuration is needed. You must add a public client with the following settings:
Setting | Value |
|---|---|
Client type | openid-connect |
Client ID | powerbi (all smaller cases) |
Client authentication | Off |
Authentication flow | Standard flow |
Root URL | |
Valid redirect URIs | |
Proof Key for Code Exchange Code Challenge Method | plain |
Technical information - Planon Connect for Analytics
Using OpenID Connect as authentication protocol for Planon Connect for Analytics gives users access to the solution via authentication against the configured Identity Provider via Keycloak.

This will result in the following flow:
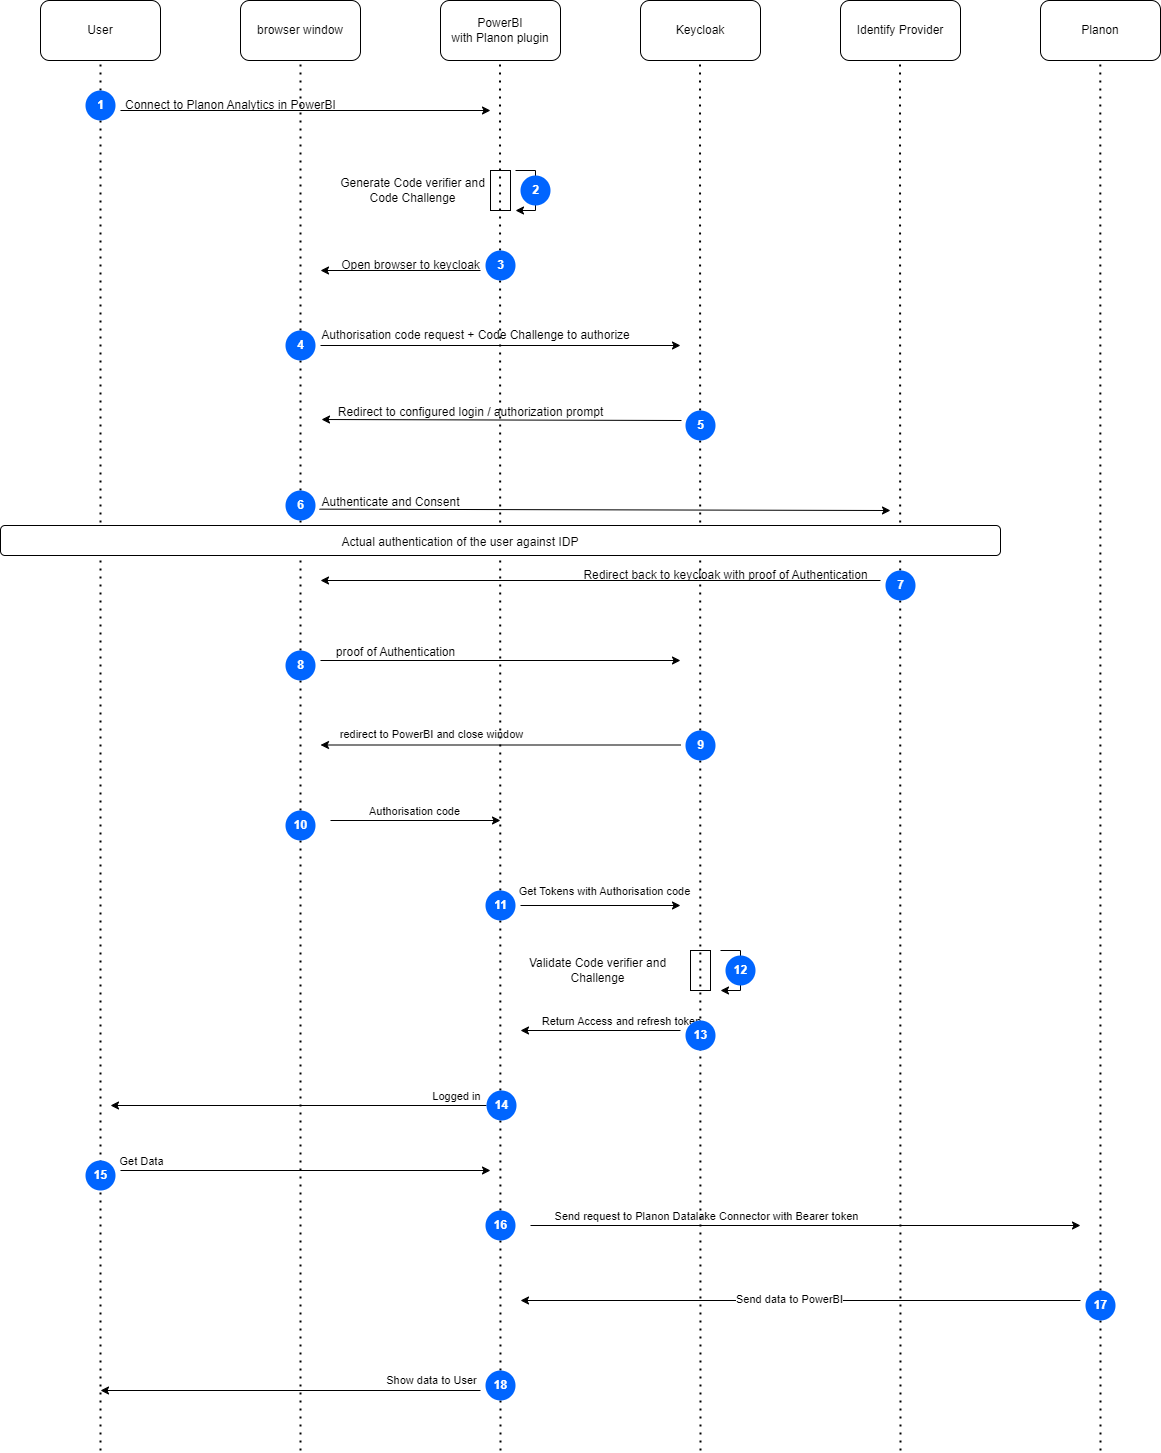
1. The user clicks Sign in when Get Data via Planon Connector .
2. Planon Connector generates a random code verifier and code challenge.
3. Planon Connector opens a browser window.
4. Planon Connector redirects the user to the Keycloak Authorization server along with the code challenge and gives PowerBI call-back URL with the request.
5. Keycloak sends a ‘redirect’ to the configured IDP.
6. The user opens the IDP and logs in.
7. User returns from the IDP as ‘authenticated’.
8. There is a response from the browser to Keycloak that the user is logged in.
9. The user is directed to PowerBI.
10. An authorization code is sent from the browser to Planon Connector and the browser is closed.
11. Planon Connector sends an authorization code to Keycloak.
12. The code verifier and code challenge are verified.
13. Planon Connector retrieves an access token and refresh token.
14. The user sees that he/she is logged in.
15. The user clicks Connect.
16. When the request is sent, the access token is sent as Bearer token to the Planon Datalake.
17. The data is sent to PowerBI.
18. Data is shown to the user.